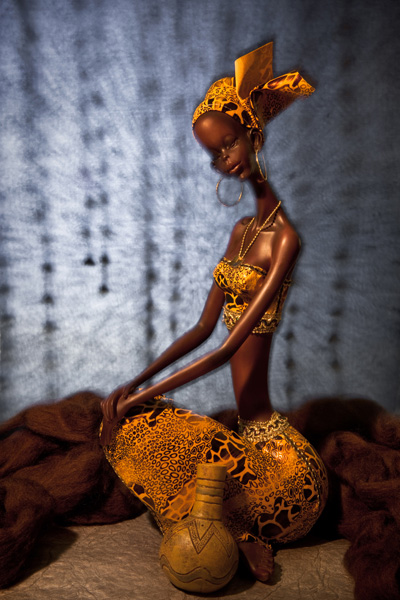
Shuter Drag Still Life – Tutorial | |
The objective here is to mix continuous light with strobe using shutter drag, i.e. keeping the shutter open to allow in more ambient light, or in this case the continuous light which was used on the background – a handmade paper with some texture on it. The following is a description of what I did: There are a couple of things you absolutely must have in place in order to make this type of shot work.
The first thing you need to do is determine the exposure on both your background and the statuette …separately. I set the expose on the background first. I knew I wanted a shutter speed of approximate 8 seconds, so I set the shutter speed on my lightmeter to 8 seconds and took a reading.
|
 |
|
It gave me an aperture of approx. f32 which was more than I wanted to used, so I added the dark blue fabric in front of the light to reduce the amount of light by two stops, giving me an exposure of 1/8, f16 @ ISO200. A couple of test shots confirmed this was perfect. Next, I shut off the background light, placed the statuette in place, and adjusted my strobe. I knew I needed the strobe output to be f16@ISO200 so I made some adjustments, using my lightmeter, and set the strobe to expose the statuette properly.
Now it was time to bring them both together. Enter the black piece of cloth. I hung the cloth on the C-stand over top of the background paper, in such a way that would allow me to pull it off quickly with one hand without disturbing anything. Prior to turning off all the lights in the room and shutting all the doors, I prefocused my camera where I wanted it and confirmed the focal length and composition were where I wanted them. Lights off, doors shut. Next I turned on the background light (which the camera cannot see because of the black cloth) and opened and locked the shutter on my camera using the remote cord. At this point everything is ready to go. |
That’s it. Do this as many times as you like, making sight adjustments as you go to change the feel until you get it the way you like. For example, you can increase or decrease the amount of zoom you apply. Or you can vary your background exposure slightly to either make the background lighter or darker. |
